Archive
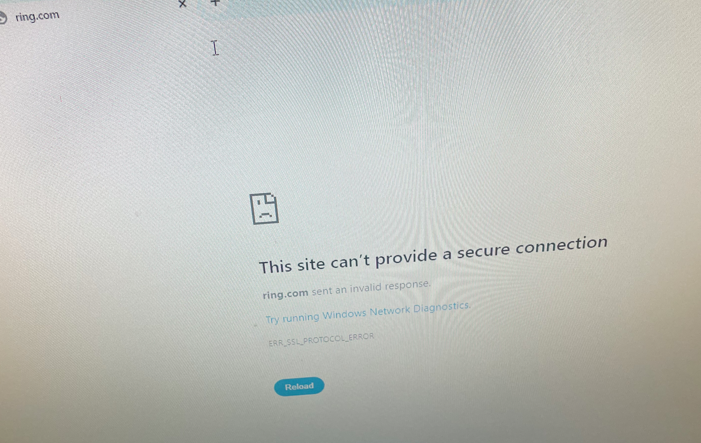
This Site can’t provide a secure connection
This happened to a client recently who had just signed up with Comcast Business account for their new office. After getting everything all set up, tried accessing several websites and found some worked while others did not with the error message “ERR_SSL_PROTOCOL_ERROR” in the picture below:

Tried restarting the comcast modem – no change; power cycling modem – no change.
Contacted Comcast (ISP) to speak with a Technician, found out that Comcast Business accounts are automatically enabling their Secure Firewall service that blocks certain sites and causes this error. Doh!!
Apparently to get this service disabled, the Comcast Technician has to do it from there end. There is nothing in the Firewall config of the comcast modem to disable it by the customer.
Cheers!
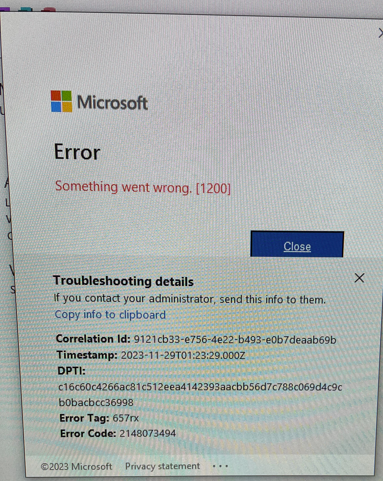
Office 365 – Something went wrong [1200]

This is a different error message from Microsoft after an apparent corruption in the logged in user’s profile.
Prior to this received the TPM Error code 80090016 – See this blog post for correcting this one: https://jvhconsulting.com/2022/10/20/error-code-80090016-tpm-has-malfunctioned/
Searching the web for answers found a few links to do the following:
- https://www.thewindowsclub.com/microsoft-sign-in-error-1200-something-went-wrong – lists a number of things to do
- clear browser cache – doesn’t do anything but lose all the browsing history and important things
- Delete Credentials folder – from users profile\appdata\local\microsoft\Credentials – While I didn’t try this, don’t think it would help.
- Perform a Clean boot – use msconfig.exe to set next startup to be clean boot – nothing in startup items.
- Open Credential Manager from Control Panel and clear out the web credentials for office – didn’t work.
- Delete the Identity Key in registry here: HKEY_CURRENT_USER\Software\Microsoft\Office\16.0\Common\Identity
- this didn’t work either.
- The Solution from a few searched sites, is to go to Settings – Accounts – Access Work or School selection – on the right side, click on each of the accounts and choose Disconnect. I believe this is the answer to this error code. Thereafter you can open Outlook, sign in again to each of the email accounts and it should work fine from there.
Cheers!
How to block Windows 11 from auto upgrading Windows 10.
Many OEM systems come with Windows 11 out of the box :(…
Systems with CPU above 7th generation and memory capacity will be scanned and allowed to auto-upgrade from Windows 10. This has caught a lot of my clients off-guard..
I found a way to prevent Windows 11 from automatically upgrading from Windows 10. Its 3 registry keys I set via my RMM agent install process.
The Keys are as follows:
reg add HKLM\SOFTWARE\Policies\Microsoft\Windows\WindowsUpdate /f /v TargetReleaseVersion /t REG_DWORD /d 1
reg add HKLM\SOFTWARE\Policies\Microsoft\Windows\WindowsUpdate /f /v TargetReleaseVersionInfo /t REG_SZ /d 22H2
reg add HKLM\SOFTWARE\Policies\Microsoft\Windows\WindowsUpdate /f /v ProductVersion /t REG_SZ /d “Windows 10”
Later, to allow Windows 11 upgrade, just change the last key to Windows 11.
Good luck!
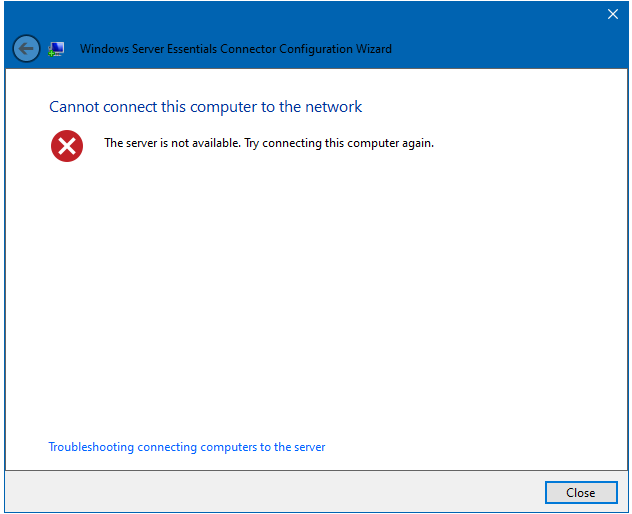
Windows Essentials Connector “Server is Not Available”

After an Essential Server migration (from 2012R2 to 2016 Essentials) I was moving my client machines to add them to the Essentials Dashboard on the new server using the Connector application. I had already removed the Essentials role from the old server – meaning it was no longer a domain controller either.
I found when running the connector the above error message kept showing up. I rebooted the server, disabled the firewall, cleaned out DNS entries of old DC/Essentials server and tried a host of other tricks found on the web – nothing worked.
Finally I found a site that suggested the workstations in the domain needed to have their secure channel reset with the new domain controller – huh – who ‘da thought that would be the case since they were authenticating and users were able to logon to their workstations just fine… That’s so weird.
To stop the above error message, all I had to do was run: nltest /sc_reset:<domain.local> (pointing to internal FQDN name of my domain). Ran this in Admin cmd prompt (or powershell)… after doing so running the connector worked!! Success.. Wished I had the link where I found this solution to provide recognition here. This also explains why the solution of disjoining workstations to domain and rejoining would work but that is a bit drastic when above command does the trick. (Another solution was to remove and re-add Essentials Experience to the server – also drastic and not necessary!).
Another thing I did was push out via my RMM the registry key to tell each system to skip domain join since they were already part of the domain. The command is the following:
reg add “HKLM\SOFTWARE\Microsoft\Windows Server\ClientDeployment” /v SkipDomainJoin /t REG_DWORD /d 1
Thanks for reading and hope above solution helps you!
Procedures for joining workgroup PCs to remote Server Essentials domain
First step with new computer setup: Create Local user on workstation – skip the OOBE, do not use Hotmail account to create user, instead select limited or no internet and then create local user account – say pcadmin. Set password and continue on till you get to the desktop.
Connecting PC to the Essentials Server:
- Go to https://foo.remotewebaccess.com/connect to download the connector tool to the workstation PC1
- Run connector software – what this does is install the certificate and the VPN connection to foo.remotewebaccess.com site which connects to the foo.local domain.
- The connector then joins the domain or at least once you’re connected, you can open: sysdm.cpl and join the domain manually.
- After joining the domain manually, DO NOT REBOOT. The reason is because you want to cache the new user1 credentials onto the workstation before rebooting and “losing” the remote connection. So you do two things 1) add user1 to local administrators group and 2) logon with user1 to workstation before you reboot – yes it will work.
- Open elevated cmd prompt.
- Type: net localgroup administrators foo\user1 /add – this adds user1 to Administrators group on PC1
- Type: runas /user:foo\user1 cmd.exe <enter key> – then type in password for user1
- This opens CMD prompt under user1 credentials which thereby creates user1 profile.
- Now you’re still connected to the VPN network so you can switch user and logon to PC1 with user1 creds
- Click start, then go to admin account and choose switch user.
- At logon prompt type foo\user1 with password – this will finish with user profile creation and cache password. Also, best once at desktop to lock workstation and unlock again with password.
- Then reboot computer
- Try logging on with user1 to foo domain.
- If it fails, then go back to local Admin account on PC1 and reconnect the remotewebaccess VPN
- Then switch user again and proceed to setup rest of items – like outlook, files etc.
Ubiquity Edgerouter enable offloading to increase throughput
I was just reading about throughputs on the Edgerouter 4 and Lites and Ubiquity came back with this article on how to increase speeds/throughput on the Edgerouters:
For these Edgerouter Models: ER-X, ER10X, ER-X-SFP, EP-R6
Open terminal (ssh/putty) to router:
Then run these commands:
configure
set system offload hwnat enable
set system offload ipsec enable
commit ; save
For these Edgerouter Models: ER-LITE,ERP0E5,ER-8,EP-R8,ER-6P,ER-12,ER-12P,ER-8-XG
Open terminal
Then these commands:
configure
set system offload ipv4 forwarding enable
set system offload ipv4 gre enable
set system offload ipv4 pppoe enable
set system offload ipv4 vlan enable
set system offload ipv4 bonding enable
set system offload ipv6 forwarding enable
set system offload ipv6 pppoe enable
set system offload ipv6 vlan enable
set system offload ipsec enable
commit ; save
After doing so on either type of Router, reboot it to make the changes effective.
For the ER-Lite, it’s supposed to increase from 300Mbps to 900Mbps throughput. I call that a winner winner chicken dinner!
Outlook client can’t find O365 to authenticate license
Have had several colleagues have a problem authenticating and authorizing their O365 office software to the O365 license servers.
Red Bar: Invalid license/not licensed
Yellow bar: other said Activate now – nothing worked to activate user to O365.
To fix this problem, had to import this registry info via a O365fix.reg file
Note: copy and paste below starting with the Windows Registry… to the 001 value on last line.
save file as o365fix.reg to c:\temp folder and then right click and merge the key on the client machine. from there it should authenticate to the license servers and be able to be used from there.
Windows Registry Editor Version 5.00
[HKEY_CURRENT_USER\SOFTWARE\Microsoft\Office\16.0\Outlook\AutoDiscover]
“ExcludeHttpsRootDomain”=dword:00000001
“PreferLocalXML”=dword:00000000
“ExcludeHttpRedirect”=dword:00000000
“ExcludeHttpsAutodiscoverDomain”=dword:00000001
“ExcludeScpLookup”=dword:00000001
“ExcludeSrvRecord”=dword:00000001
“ExcludeExplicitO365Endpoint”=dword:00000001
Cheers!
2016 Essentials – Anywhere Access setup fails
When setting up new 2016 Essentials or really any version of Essentials and you’re trying to create/add a domain to append to the remotewebaccess.com domain name the UI wizard fails with this error window:

“An error occurred while setting up your domain name: The domain name was not setup for your server. Wait a few minutes and run the wizard again. An unknown error occurred.
No matter how much time you wait, the same error pops up each time. The problem isn’t DNS, or the server itself but rather the Cert revocation checks for .Net Framework!!
To fix this you have to create a .reg file (call it what you want but it has to include the following settings:
Windows Registry Editor Version 5.00
[HKEY_LOCAL_MACHINE\SOFTWARE\Microsoft\.NETFramework\v2.0.50727]
“SystemDefaultTlsVersions”=dword:00000001
“SchUseStrongCrypto”=dword:00000001
[HKEY_LOCAL_MACHINE\SOFTWARE\Microsoft\.NETFramework\v4.0.30319]
“SystemDefaultTlsVersions”=dword:00000001
“SchUseStrongCrypto”=dword:00000001
[HKEY_LOCAL_MACHINE\SOFTWARE\Wow6432Node\Microsoft\.NETFramework\v2.0.50727]
“SystemDefaultTlsVersions”=dword:00000001
“SchUseStrongCrypto”=dword:00000001
[HKEY_LOCAL_MACHINE\SOFTWARE\WOW6432Node\Microsoft\.NETFramework\v4.0.30319]
“SystemDefaultTlsVersions”=dword:00000001
“SchUseStrongCrypto”=dword:00000001
After making the reg file, merge, REBOOT the server or the Anywhere access wizard may still show above error message. After reboot, open Essentials Console and re-rerun the Anywhere Access wizard, user a Hotmail account to create the domain <customer>.remotewebaccess.com. Then click the wizard to install VPN and Remote Desktop Make sure the router and ISP are forwarding port 443 to the Essentials server.
UPDATE: December 5, 2022.
Tonight after having a similar issue with a 2016 Essentials server and Devices all turning to gray (Offline state) after installing the Anywhere Access to the server. (Had to manually install RRAS for Direct Access and VPN before the Anywhere Access wizard would install successfully – but that’s another blog I need to write). Installing the Direct Access role disconnected all the clients from the dashboard and no matter what we tried to “fix” the client nothing worked. argh!!
Update: September 16, 2023
Today I found that I could no longer create a new remote connection with the *.remotewebaccess.com domain name. After extensive troubleshooting, decided to just use the CA resources on the Essentials server to create my own Remote Certificate for Remote Site and VPN solution. Rather than make this blog that much longer, I created a new post here: https://jvhconsulting.com/2023/09/17/2016-essentials-remote-vpn-alternative/ where you can find all the details for performing this alternative solution.
Computers not showing up in Dashboard – Offline status
1. Uninstalled the Connector;
2. Delete Data & Logs folders from \ProgramData\Microsoft\Windows Server;
3. Open Task Scheduler, delete all tasks under: Microsoft >Windows >Windows Server Essentials. Then delete this folder.
4. Delete the VPN SSTP connector.
5. Reboot client
6. Reinstall the Client connector. For most other occasions this should fix the clients.
In tonight’s case though, messing with the client did not fix it. What did finally work is found under this Blog by ShoemakerBrian.
Not sure how he found this solution but it instantly fixed the clients Online status:
Open Admin PowerShell and run command below, changing the IP with the IP address of the Essentials server:
Set-NetNatTransitionConfiguration –IPv4AddressPortPool @(“192.168.1.10, 6001-6601”, “192.168.1.10, 6603-47000”)
Brilliant! – All clients now showed up in the Dashboard.
Hope this helps everyone that runs into this issue. It’s a frustrating one and not many solutions out there.
Unifi Cloud Key WEB UI Password doesn’t work: “Invalid username and/or password”
Attempts to logon to the Unifi Cloud-Key website for example: http://10.1.10.10 fails no matter if the username/password you enter is correct. Error message you get is: “Invalid Username and/or password”.
Well that stinks. hmmm how to fix. Let’s try to connect using SSH (I like to use putty.exe)
Putty to 10.1.10.10 – using username and password combination that failed above worked just fine, I’m in, i can see all the commands etc. Okay that works but then the UI should work – Nope!
After hours… I mean hours of searching different communities and solutions, this was the solution to fix it. It did happen to come from a Unifi Tech – 5 years ago – which means they still haven’t fixed it in their cloud key products :(.
FROM UNIFI techs: The issue appears to be arising from incorrect SUID account privileges on the UCK system.
This can be confirmed by sshing into the CloudKey and running the following command:
ls -l /usr/bin/sudo
This should return output similar or identical to the following if the same root cause:
-rwxr-xr-x 1 root root 106820 Jan 10 2016 /usr/bin/sudo
To resolve this and ensure that any suid issues are not causing the issue, run the following command (Recommend copy & paste):
chmod u+s /usr/bin/sudo
Re-test logging in to the WebUI and confirm the issue is resolved. YEP that worked!
I’m posting this again so people searching for this can find it faster than searching through 13 pages of the above solution from this link: https://community.ui.com/questions/Cannot-log-in-to-Cloud-Key-WebUI/e31a1fc1-7e19-40a7-a266-4d36c35825e4
Outlook Crashes/hangs since July 2020
Outlook Crashes/hangs July 2020
Ever since July of 2020, Msft has pushed out a few bad versions of office 365 which has caused client outlooks to crash and burn :(… The first time this happened, a large portion of my clients had this problem and so I created a script to fix them and used my RMM to push out the fix to all windows 10 machines with O365. By doing this they were able to get back to a working Outlook until MSFT fixed their bad update. It happened again later in 2020 and had to perform similar steps:
- “C:\Program Files\Common Files\microsoft shared\ClickToRun\officec2rclient.exe” /update user updatetoversion=16.0.6366.2062 all as one line.
2. If that fails run this:
“C:\Program Files\Common Files\microsoft shared\ClickToRun\officec2rclient.exe” /update user updatetoversion=16.0.12827.20470
Best of luck!